Changing your cPanel password is a straightforward process, but if you’re new to cPanel, it might feel a bit overwhelming. Don’t worry! I’ve got you covered with this easy-to-follow guide. Let’s make this as simple and fun as possible, so you can get your password updated in no time!
Why Change Your cPanel Password?
Before we dive into the steps, let’s briefly chat about why changing your cPanel password is important. Just like you wouldn’t want someone snooping around your personal email, keeping your cPanel password secure is crucial. Knowing how to change the password in cPanel regularly helps protect your hosting account from unauthorized access and potential security threats.
Step-by-Step Guide to Changing Your cPanel Password
Step 1: Log In to Your cPanel
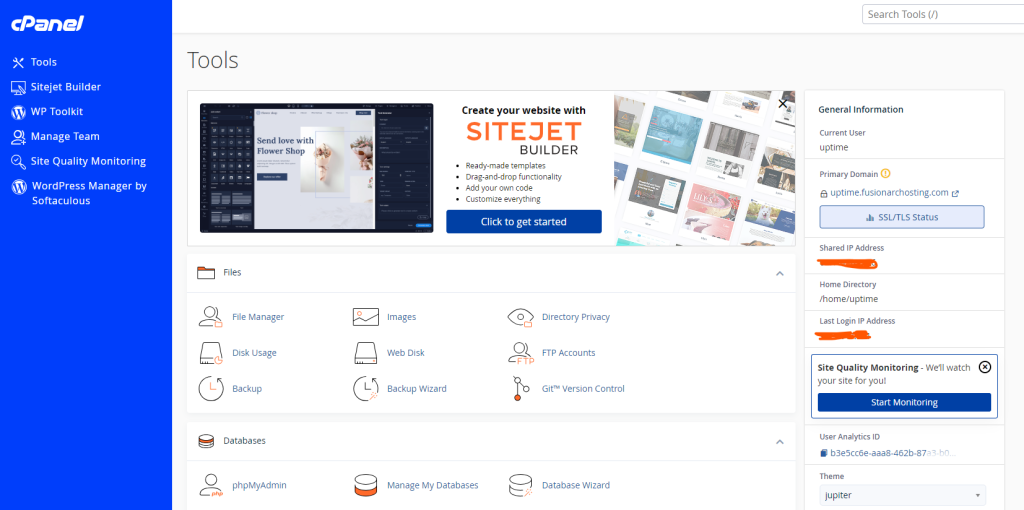
First things first—let’s get you logged in to your cPanel account. Open your web browser and go to your hosting provider’s cPanel login page. Enter your current username and password, then click the “Log In” button. If you’ve forgotten your login credentials, you might need to reset them through your hosting provider’s support. Remember, understanding how to change the password in cPanel is essential for account management.
Step 2: Locate the Password & Security Section
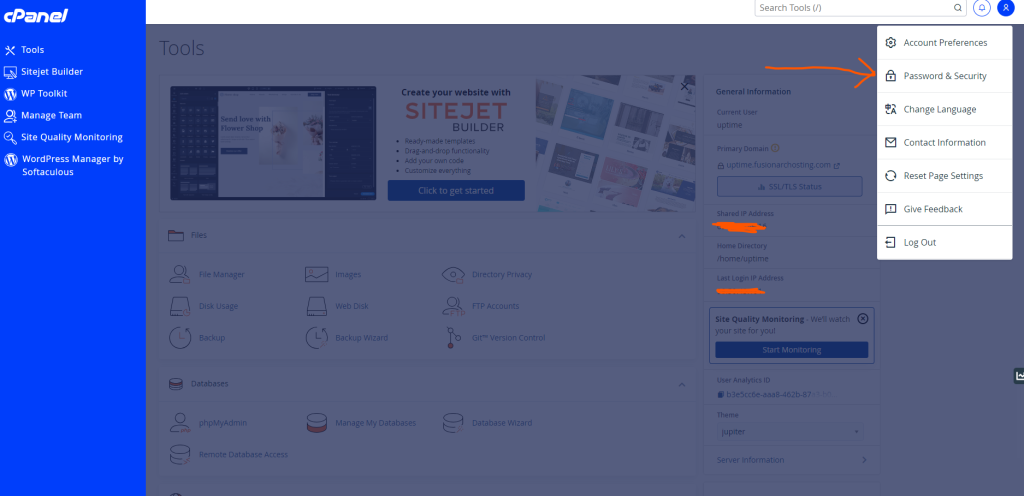
Once you’re in, look for the “Preferences” section. Here, you’ll find an option labeled “Password & Security.” Click on it, and you’re halfway through the process of changing your cPanel password!
Step 3: Enter Your Current Password
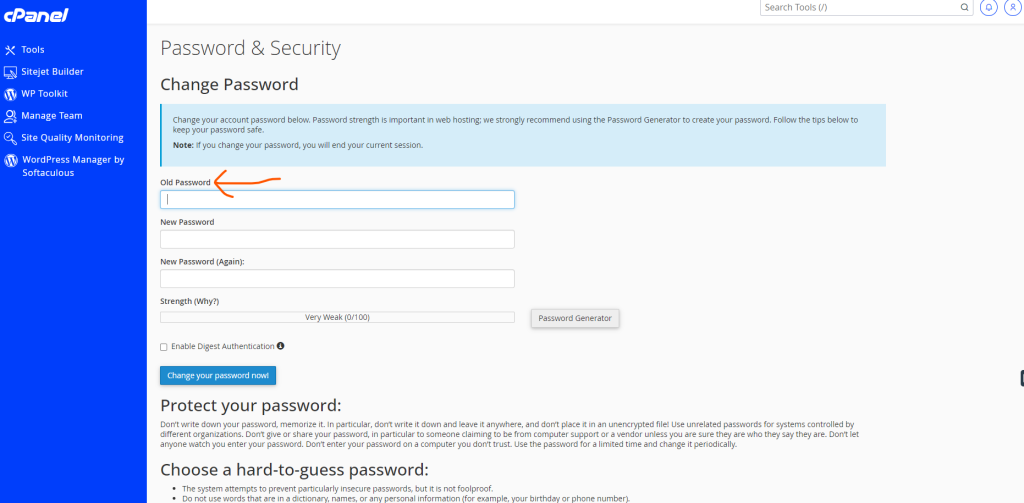
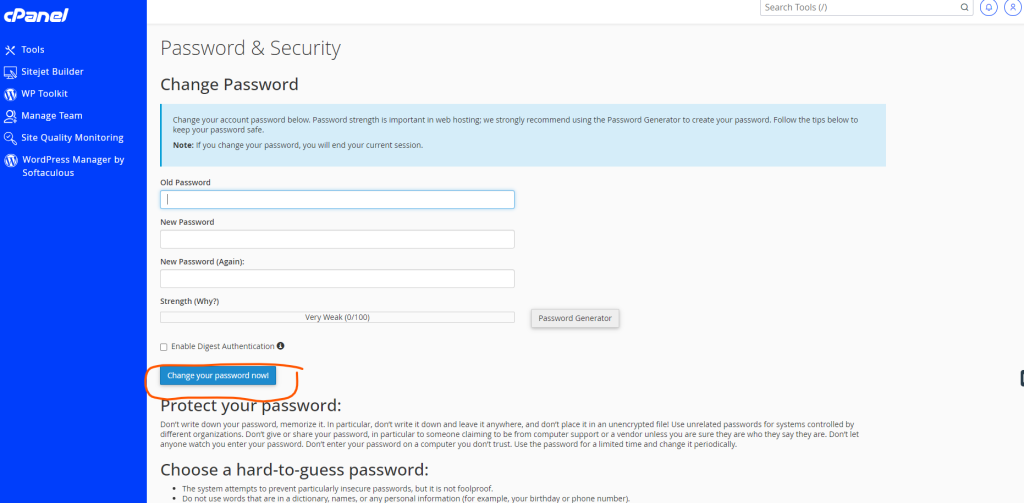
You’ll be prompted to enter your current password. This step is important to verify that it’s really you making the change. Type your current password into the provided field to proceed with how to change the password in cPanel.
Step 4: Set a New Password
Now for the fun part—creating your new password! Choose a strong password that combines uppercase and lowercase letters, numbers, and special characters. The stronger your password, the more secure your account will be. Enter your new password into the designated field, and then type it again in the “Confirm New Password” field to ensure it matches. Following these steps is key in understanding how to change the password in cPanel properly.
Step 5: Save Your Changes
Double-check that everything looks good. If you’re happy with your new password, click the “Change your password now!” button. Voilà! Your password has been updated. Don’t forget to save your new password in a secure place or use a password manager to keep track of it. Knowing how to change the password in cPanel will greatly enhance your account’s security.
Tips for a Strong Password
- Length Matters: Aim for at least 12 characters.
- Mix It Up: Use a combination of letters, numbers, and symbols.
- Avoid Common Words: Steer clear of easily guessed words or phrases.
- Update Regularly: Change your password every few months for extra security.
Wrapping Up
Congratulations, you’ve just updated your cPanel password like a pro! Changing your password is a simple yet essential step in keeping your hosting account secure. Remember, a strong password is your first line of defense against unauthorized access. If you have any questions or run into any issues with how to change the password in cPanel, don’t hesitate to reach out to our support team—we are here to help!
Keep this guide handy for future reference, and don’t forget to share it with friends who might find it useful. Happy hosting!


