Installing plugins is a key way to extend the functionality of your WordPress site, and sometimes you may receive plugins in a ZIP file format. Knowing how to install WordPress plugins from a ZIP file can be a useful skill for customizing and optimizing your site. This guide will walk you through the process step-by-step.
What Is a ZIP Plugin File?
A ZIP file is a compressed file format that contains the plugin’s files and folders. Many WordPress plugins are distributed in this format for easy download and installation. ZIP files are commonly used for plugins that are not available in the WordPress Plugin Directory or for premium plugins that you’ve purchased.
Why Install Plugins from ZIP?
- Premium Plugins: Often purchased from third-party websites.
- Custom Plugins: Developed in-house or by a developer for specific needs.
- Offline Installation: Useful if your site has limited internet access or if you’re moving plugins between sites.
Step-by-Step Guide to Installing WordPress Plugins from ZIP
1. Download the ZIP File
Ensure you have the ZIP file of the plugin you wish to install. This file should be downloaded from a trusted source to avoid security risks.

2. Log In to Your WordPress Admin Dashboard
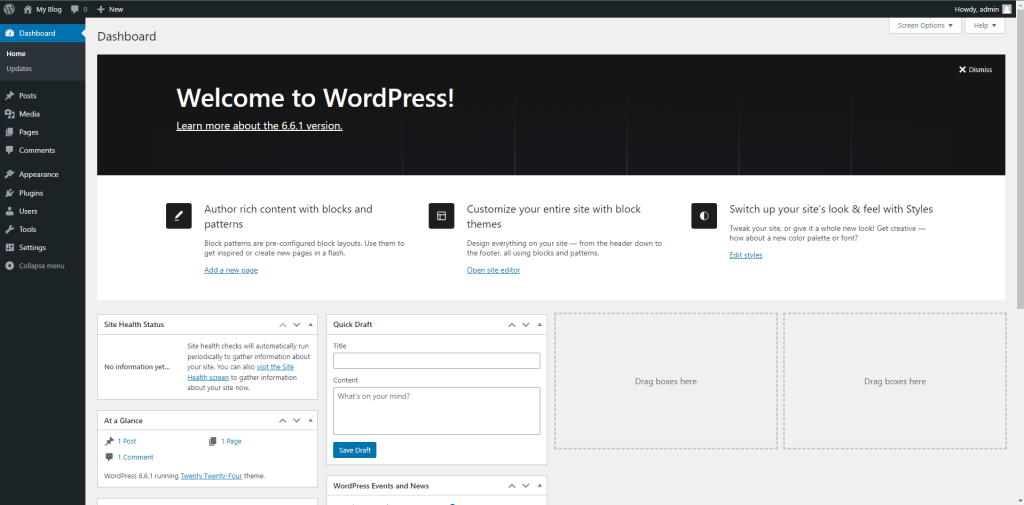
Navigate to your WordPress admin dashboard by visiting yourdomain.com/wp-admin and log in with your credentials.

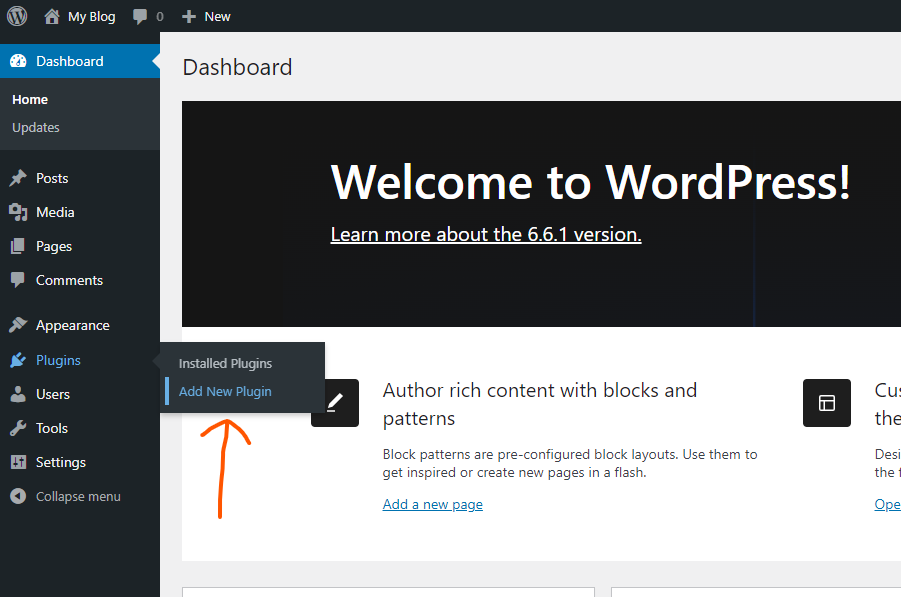
3. Go to the Plugins Section
In the left-hand menu, hover over or click on “Plugins” and select “Add New.”

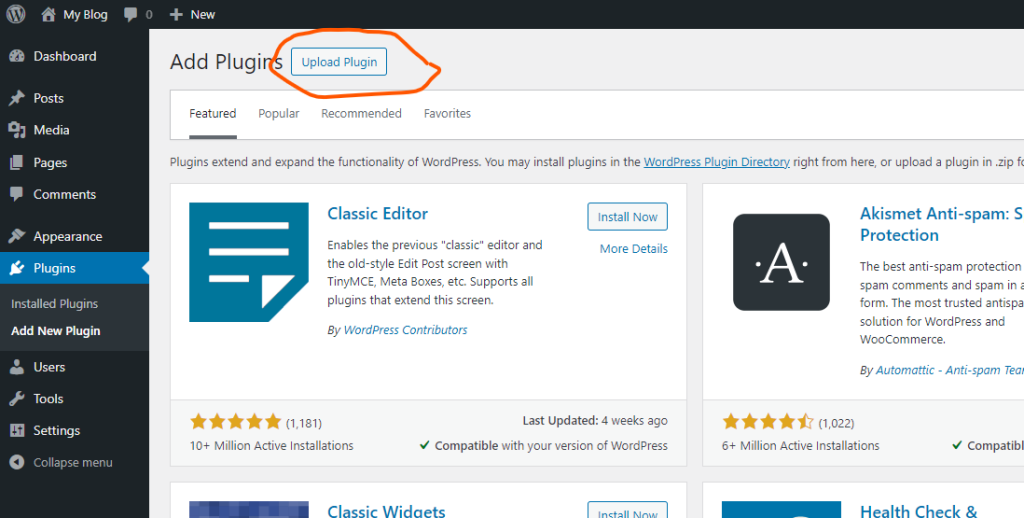
4. Click on “Upload Plugin”
At the top of the Add Plugins page, you’ll see an “Upload Plugin” button. Click on this button to open the upload form.
5. Choose the ZIP File
Click the “Choose File” button (or “Browse” depending on your browser) and locate the ZIP file of the plugin on your computer. Select the file and then click “Open.”

6. Install the Plugin
After selecting the file, click on the “Install Now” button. WordPress will upload and install the plugin from the ZIP file.
7. Activate the Plugin
Once the installation is complete, you’ll see a success message and a link to activate the plugin. Click the “Activate Plugin” link to enable it on your site.
Troubleshooting Common Issues
- File Size Exceeds Limit: If you encounter an error stating the file size exceeds the maximum upload limit, you may need to adjust the upload_max_filesize and post_max_size settings in your server’s php.ini file or contact your hosting provider for assistance.
- Plugin Not Appearing: Ensure the ZIP file is correctly formatted and not corrupted. If problems persist, try re-downloading the file or contacting the plugin provider.
Best Practices for Installing Plugins
- Backup Your Site: Always back up your WordPress site before installing new plugins to avoid potential issues.
- Check Compatibility: Ensure the plugin is compatible with your version of WordPress to prevent conflicts.
- Update Regularly: Keep your plugins updated to benefit from new features and security patches.
Conclusion
Installing WordPress plugins from a ZIP file is a straightforward process that can significantly enhance your site’s functionality. By following these steps, you can easily add new features and customize your WordPress site according to your needs. Whether you’re installing premium plugins or custom solutions, mastering this process ensures that your site remains functional and up-to-date.


